How to make a dashboard and share it?
Put the widgets you check most on one page, and share it.
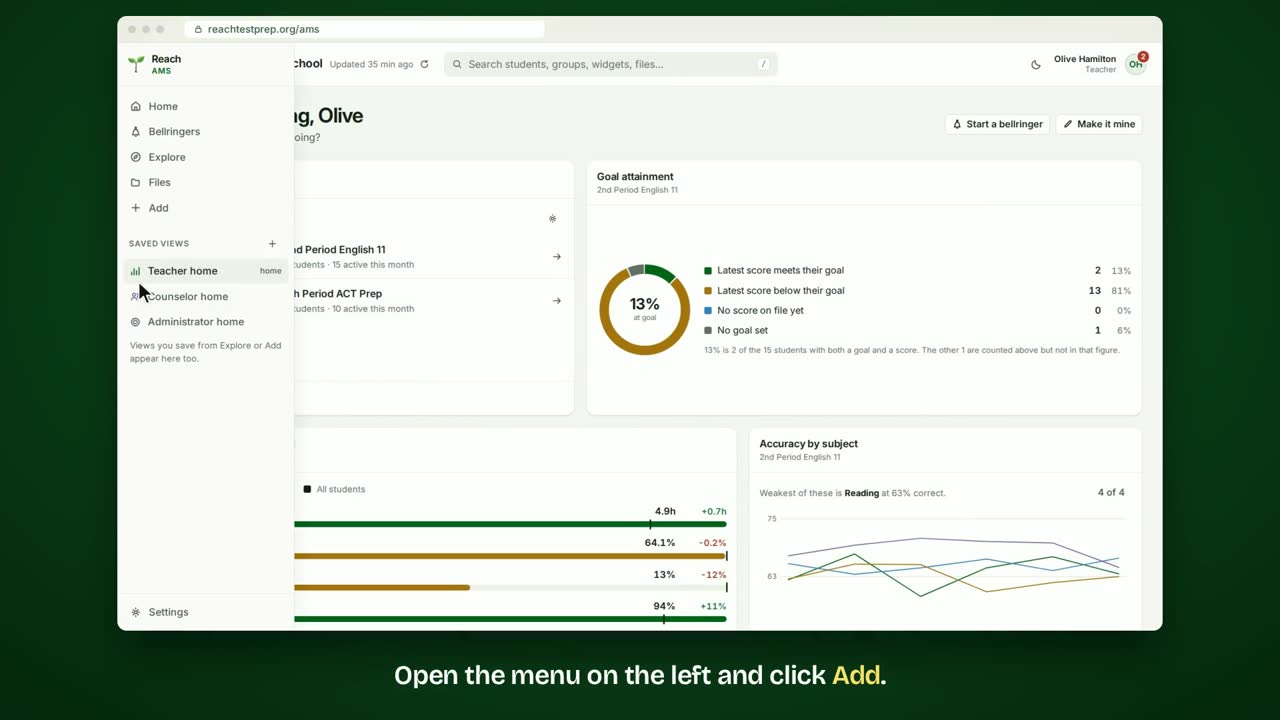
Step by step
- Open the menu on the left and click Add.
- First, click All students and choose your class. The widgets you place will show it.
- Click a widget to place it on your dashboard.
- They land on the board below. Drag a widget by its top to move it.
- Click Save and give your dashboard a name.
- Pick a colour and an icon, so it's easy to spot in your menu.
- To share it, click Share.
- Tick the colleagues you want to share it with.
- Choose what they can do, then click Share.
- Samuel now has it in his menu. Change or remove his access here any time.
In short
In the menu, click Add, then click widgets to place them. Click Save, and give your dashboard a name and a colour. Click Share, tick your colleagues and choose what they can do.
ACT® is a registered trademark of ACT Education Corp. Reach Test Prep isn’t affiliated with ACT. Spotted something out of date? Email reach@reachtestprep.org.